DIY Patio Paver Construction
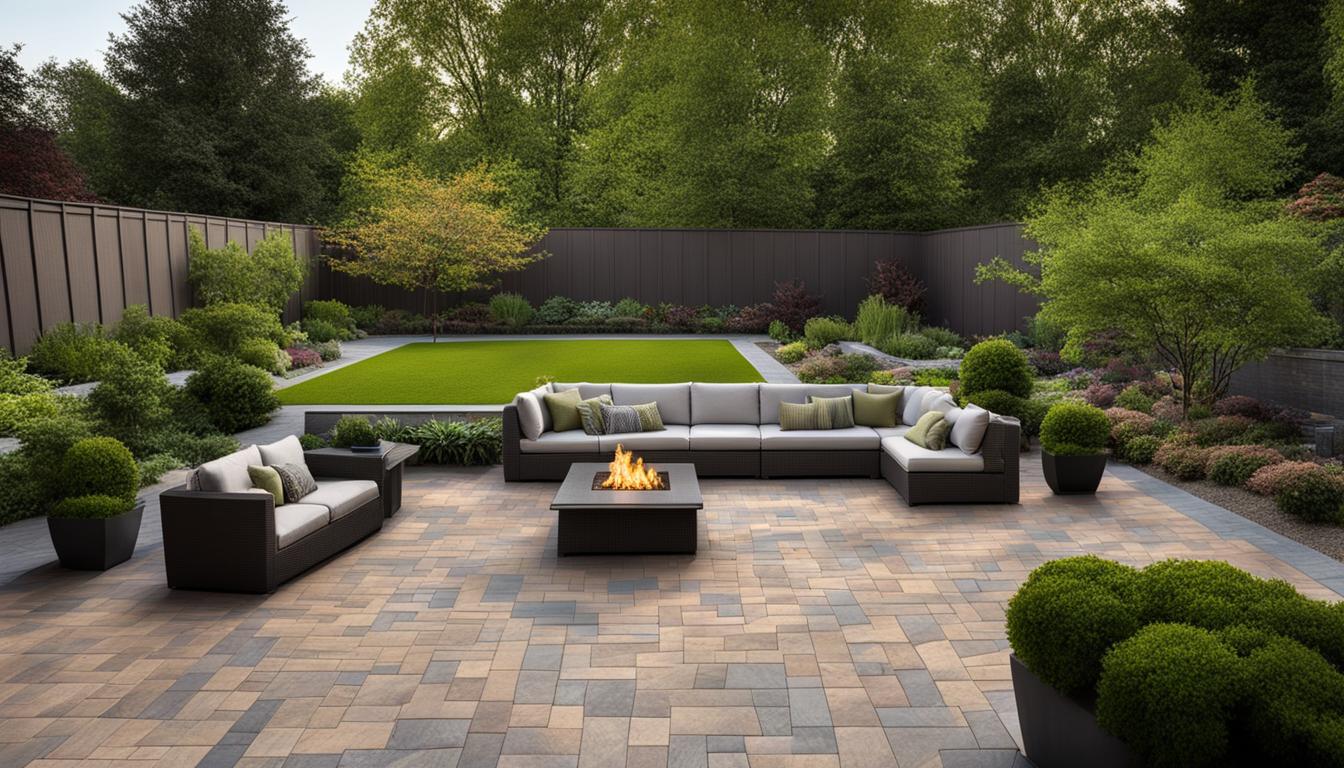
If you’re looking to enhance your outdoor space with a functional and beautiful patio surface, building your own patio paver can be a rewarding DIY project. With the right materials and tools, you can create a durable and long-lasting patio that complements your garden and provides a comfortable space to relax and entertain.
In this section, we’ll guide you through the process of building a patio paver in your own backyard. From planning and gathering materials to installation and finishing touches, we’ll provide step-by-step instructions to help you achieve the patio of your dreams.
Key Takeaways:
- Building your own patio paver can be a rewarding DIY project.
- Proper planning, gathering materials, and site preparation are essential for a successful patio paver construction.
- A sturdy base and proper paver installation techniques are crucial for a durable and long-lasting patio.
- Finishing touches like edge restraints, joint sand, and sealants can enhance the appearance and longevity of your patio paver.
- Maintenance and care are necessary to keep your patio looking its best and addressing common issues like weeds and drainage.
Planning Your Patio Paver Project
Before beginning your patio paver project, you must first plan out the details of your project. Proper planning is essential to ensure the success of your paver installation and guarantee that it complements the overall design of your garden.
Selecting the Right Pavers
The pavers you choose will be the building blocks of your patio, and they come in a variety of materials, sizes, colors, textures, and patterns. Consider the overall look and feel you want to achieve in your garden, and select a paver that complements your design vision.
Popular types of pavers include concrete, brick, and natural stone. Concrete pavers are versatile and come in a range of colors and shapes, making them a popular choice for a variety of garden styles. Brick pavers offer a classic and elegant look and are often used for traditional garden designs. Natural stone pavers are durable and give a more organic look to your patio, making them a great choice for a rustic or naturalistic garden design.
Measuring Your Space
Before purchasing your pavers, it’s important to measure your space accurately. This will help you determine how many pavers you need and ensure that you don’t run out or purchase too many. Measure the length and width of your patio area and record the measurements.
It’s also important to consider the thickness of your pavers and the depth of your base layer to determine the overall height of your patio surface. A typical range for the total height of the patio paver installation is between 4 to 6 inches.
Designing Your Patio

Your patio design should complement the overall design of your garden and enhance its aesthetic appeal. Sketch out a design plan that includes the placement and arrangement of your pavers, any borders or accents, and any other outdoor features that complement your overall garden design.
You may also want to include outdoor lighting, furniture, and planters in your patio design to make it a functional and cozy space for entertaining or relaxing.
Seeking Professional Help
Planning and designing your patio paver project may seem daunting, and it’s always a good idea to seek professional help if you’re uncertain about any aspect of the project. A landscape designer or patio paver installation expert can help you select the right pavers, design your space, and ensure that your patio paver project is a success.
Gathering Materials and Tools
Before you start your patio paver construction project, you need to gather all the necessary materials and tools. This ensures that you have everything you need to complete the job efficiently and effectively. Here’s a comprehensive list of all the materials and tools you’ll need:
Materials:
- Patio pavers
- Gravel
- Sand
- Landscape fabric
- Polymeric sand (optional)
- Edge restraints (optional)
Tools:
- Tape measure
- Shovel
- Rake
- Wheelbarrow
- Compactor or tamper
- Circular saw with a diamond blade (optional)
- Chisel and hammer (optional)
- Rubber mallet (optional)
- Level
- Safety glasses and gloves
Make sure you have all the necessary materials and tools before beginning your project, as it will save you a lot of time and stress later on. With everything you need on hand, you can concentrate on building a beautiful and long-lasting patio surface.
Preparing the Site for Your Patio Paver Construction
Before you begin laying down the pavers, it’s important to properly prepare the site to ensure a solid foundation for your patio. Follow these steps to get started:
- Clear the area: Remove any plants, rocks, or debris from the site. This will help prevent unevenness in the ground and ensure a level base for your patio.
- Mark the layout: Use stakes and string to mark the outline of your patio. Double-check your measurements to ensure accuracy.
- Excavate the site: Dig down at least 6-8 inches to create space for the base materials and pavers. Make sure the excavation is even and level.
Once you’ve completed these steps, you’re ready to move on to the next stage of your patio paver construction.
Note:
Make sure to wear appropriate safety gear, such as gloves and safety glasses, when excavating the site. It’s also a good idea to call your local utility companies to mark any buried wires or pipes before digging.
Installing the Base
Now that you have cleared and excavated your site, it’s time to install the base for your patio paver. The base layer provides stability and prevents shifting of the pavers over time.
Before starting, make sure you have all the necessary materials and tools, including:
- Paver base material
- Paver sand
- Shovel
- Wheelbarrow
- Hand tamper
Here’s how to install the base for your patio paver:
- Spread a layer of paver base material over the excavated site. Make sure the layer is level and compact it with a hand tamper. The thickness of the layer will depend on the type of pavers you are using and the climate in your region, so check the manufacturer’s recommendations.
- Spread a layer of paver sand over the compacted base material. The sand provides a smooth and level surface for the pavers to rest on.
- Level the sand layer with a 2×4 board, using a back-and-forth motion to distribute the sand evenly.
- Compact the sand layer with a hand tamper to create a solid surface.
- Repeat steps 2-4 until you reach the desired height for your base layer. This height will depend on the thickness of your pavers and the overall design of your patio.
Once your base layer is complete, make sure it is level and even by checking it with a long, straight board or level. Making adjustments at this stage will prevent problems later on in the installation process.
Table Example:
| Paver Type | Base Material Thickness | Paver Sand Thickness |
|---|---|---|
| Concrete | 4-6 inches | 1 inch |
| Brick | 6-8 inches | 1-2 inches |
| Natural Stone | 8-10 inches | 2 inches |
Note: The thickness of the base material and paver sand may vary based on climate, soil conditions, and other factors. Always check the manufacturer’s recommendations for your specific paver type.
Laying the Pavers
Now that you have properly installed the base layer, it’s time to lay down the pavers to create the surface of your patio. Start in one corner and work your way across in a consistent pattern, taking care to achieve an even distribution of colors and shapes.
If your patio includes curves or non-linear sections, consider using a flexible border material to allow for natural movement. This can help prevent cracking or shifting over time.
As you lay each paver, use a rubber mallet to gently tap it into place and ensure it sits firmly on the base layer. Continue laying pavers until you reach the edge of the patio or come across any obstacles that require cutting and fitting.
To ensure a clean and professional look, use a straight edge or string line to guide your paver placement and maintain a consistent width for the gaps between each paver. Once you have laid all the full-size pavers, you can proceed to cut and fit the smaller pieces to fill in gaps and create a cohesive surface.
Tips for Cutting and Fitting Pavers
If you need to cut pavers to fit specific areas, use a diamond blade wet saw or a guillotine-style splitter. Work slowly and carefully to prevent breaking or cracking the pavers.
For curves or irregular shapes, use a pencil to mark the paver where it needs to be cut and then use a chisel or masonry saw to make the cut.
When fitting pavers around edges or obstacles, use a combination of cutting and trial-and-error fitting until you achieve the desired result.
Once all pavers are in place, use a level to ensure that they are even and that there are no high or low spots. Make any necessary adjustments by tapping the pavers with a mallet or adding/removing base material underneath.
Congratulations, you’re almost there! The final step is securing and leveling the pavers to ensure a stable and visually appealing patio surface.
Cutting and Fitting Pavers
The shape and layout of your patio may require cutting or fitting pavers to achieve a perfect fit. Here’s how to do it:
- Measure the space where the paver needs to be cut or fitted.
- Mark the cut line on the paver with a straight edge and a pencil.
- Put on safety glasses and ear protection.
- Score the paver along the cut line with a diamond blade saw.
- Tap the scored line gently with a hammer to break the paver along the line.
- Use a chisel and hammer to smooth the cut edge and adjust the shape of the paver as needed.
If you need to fit pavers around a curve, use a rope or garden hose to outline the curve on the ground. Lay the pavers along the curve, leaving about 1/4 inch between each paver. Trace the curve on the pavers with a pencil, then cut along the line with a diamond blade saw.
Remember to wear safety gear, including gloves, when cutting and fitting pavers.
Securing and Leveling the Pavers
Securing and leveling your patio paver is essential to create a stable and aesthetically appealing surface. Here are the steps you need to follow to secure and level your pavers:
- Secure the pavers: Once you have laid down all pavers, insert edge restraints to hold the pavers in place. Edge restraints can be made of plastic, aluminum, or concrete, and will help prevent the pavers from shifting over time. Use landscape spikes or stakes to anchor the edge restraints to the ground.
- Level the pavers: Use a level to ensure that all the pavers are even and flush with each other. Adjust the pavers as needed by tapping them with a rubber mallet or gently lifting and repositioning them. If you’re working on a larger patio, divide it into sections and level each section separately.
Once you have secured and leveled the pavers, it’s time to fill in the gaps between them with joint sand. Joint sand stabilizes the pavers and prevents weed growth. Spread the sand evenly over the surface, using a broom to sweep it into the gaps. Repeat this process until all the gaps are filled.
If there are any remaining uneven areas, use a trowel to fill them with extra sand and level them out. Once the sand is in place, use a compactor to settle it and remove any excess. The final result should be a smooth, level, and stable patio surface that enhances your outdoor space.
Adding Finishing Touches
After completing the installation of your patio pavers, adding the finishing touches will help elevate the look and functionality of your new outdoor space. Here are some optional steps to consider:
Edge Restraints
Edge restraints help keep your pavers in place and prevent them from shifting over time. Typically made from concrete or plastic, edge restraints are installed around the perimeter of your patio and secured with spikes or adhesive.
Joint Sand
Joint sand is swept into the gaps between your pavers to help lock them in place and promote stability. Once the sand is spread evenly across the surface, it should be misted with water to activate and settle it into the joints.
Sealer
A sealer can be applied to your patio pavers to protect them from staining, fading, and weather damage. Sealer comes in different finishes, such as natural or glossy, and can be applied with a brush, roller, or sprayer.
Planters and Décor
Adding planters and other outdoor décor can help personalize your patio and make it feel like an extension of your indoor living space. Consider incorporating your garden design into your patio by adding complementary plants and decorative elements.
Maintenance and Care
Now that your patio paver construction project is complete, it’s important to maintain and care for your new hardscape addition to your backyard.
Cleaning
Regular cleaning is necessary to keep your patio pavers looking their best. First, sweep away any loose dirt and debris. Then, use a garden hose or pressure washer with a fan spray nozzle to remove any stains or built-up dirt. For tougher stains, add a mild detergent or special cleaning solution designed for pavers. Avoid using bleach or harsh chemicals, as they can damage or discolor the pavers.
Weed Control
Weeds can quickly grow between the gaps of your patio pavers, detracting from the overall appearance and stability of your patio. To prevent this, regularly pull any visible weeds, roots and all. You can also apply a weed killer solution or use a weed barrier fabric before installing the pavers, to prevent weeds from growing in the first place.
Sealing
Sealing your patio pavers is optional but can help protect them from stains and other damage. Before sealing, make sure the pavers are completely dry and clean. Then, apply a sealer according to the manufacturer’s instructions. Sealers usually need to be reapplied every few years to maintain their effectiveness.
Drainage
Proper drainage is essential to prevent water buildup and damage to your patio pavers. Make sure the surface of your patio slopes away from your house, so water can run off. You can also install a drainage system or gravel layer beneath the pavers, to help channel water away from the surface.
Regular Inspection
Regularly inspect your patio pavers for any signs of damage or shifting. Look for cracks, loose or broken pavers, and any areas where water may be pooling. Address any issues as soon as possible to prevent further damage.
By following these simple maintenance and care tips, you can keep your patio paver construction project looking beautiful and functional for many years to come.
Conclusion
Building your own patio paver can be a rewarding experience that enhances the look and functionality of your outdoor living space. By following the step-by-step instructions provided in this article, you can make a beautiful and durable patio surface that complements your garden.
Remember to plan your project carefully, gather all the necessary materials and tools, and properly prepare the site before laying down your pavers. Take your time in the installation process and be sure to secure and level the pavers for a sturdy and even surface. And don’t forget those finishing touches that can add a touch of elegance and protect your patio from wear and tear.
To keep your patio looking great, regular maintenance is key. Periodically clean your patio and address any issues like weed growth or drainage problems. With the right care, your patio paver can last for years to come.
Thank you for following our guide on how to build a patio paver. We hope you enjoy your newly transformed outdoor space!
FAQ
How long does it take to build a patio paver?
The time it takes to build a patio paver depends on the size of the project and your level of experience. Generally, it can take anywhere from a few days to a couple of weeks.
What type of pavers should I use?
There are various types of pavers available, including concrete, brick, and natural stone. The best type of pavers for your patio will depend on your personal preference, budget, and the overall design aesthetic you’re aiming for.
How do I measure my space for patio pavers?
To measure your space for patio pavers, simply measure the length and width of the area where you want to install the patio. Multiply the two measurements together to calculate the square footage.
Do I need to excavate the site for a patio paver?
Yes, it’s important to excavate the site to create a proper foundation for your patio paver. This involves removing any existing grass, plants, or debris and digging down to the appropriate depth to accommodate the base and pavers.
How do I secure the pavers in place?
Pavers can be secured in place using a combination of edge restraints and joint sand. Edge restraints help keep the pavers from shifting, while joint sand is swept into the gaps between the pavers to provide stability and prevent weed growth.
How often should I clean and maintain my patio paver?
It’s recommended to clean and maintain your patio paver on a regular basis. Sweeping off debris, removing any weeds, and rinsing with water can help keep the pavers looking their best. Additionally, it’s a good idea to reapply joint sand and seal the pavers every few years.
- Crafting a Dream Patio with Pavers - November 26, 2023
- DIY Patio Paver Construction - November 24, 2023
- Creating Stunning Patios with Pavers - November 21, 2023