Creating Stunning Patios with Pavers
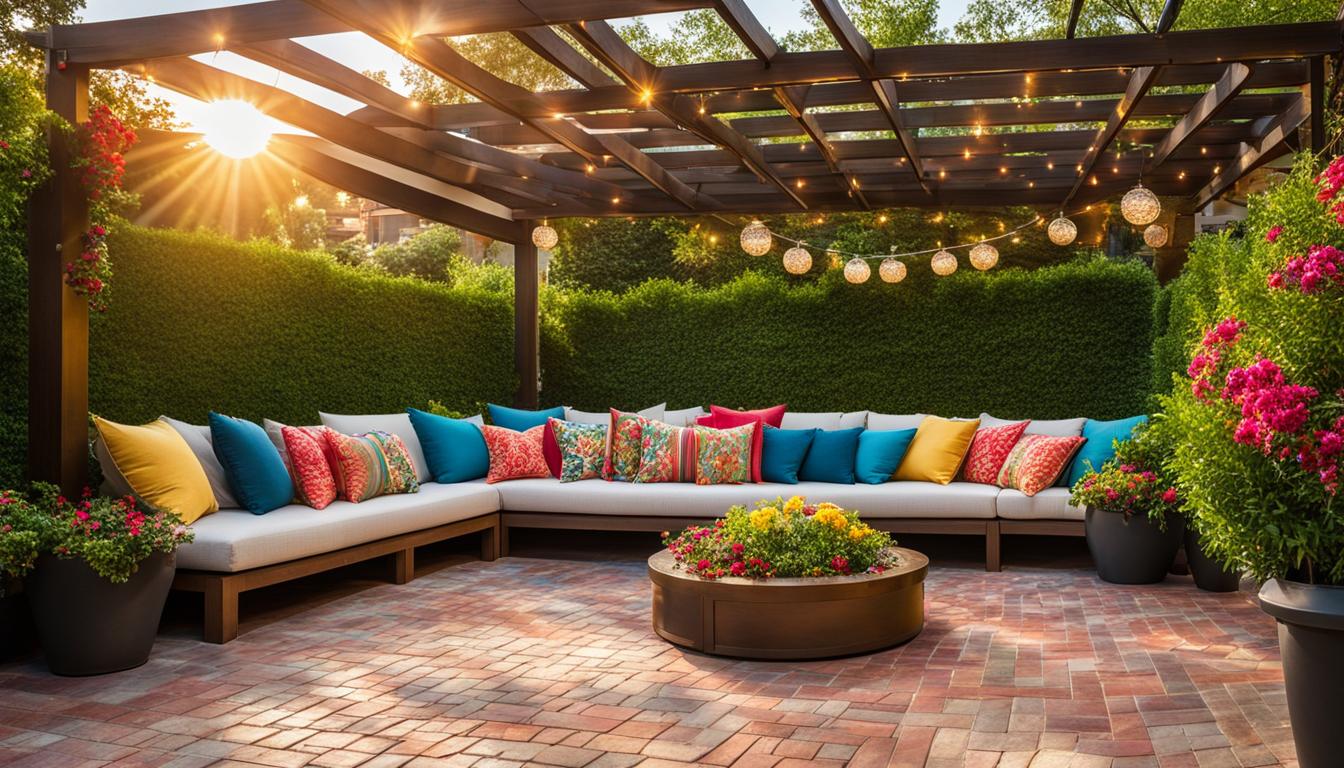
If you’re looking to enhance your outdoor living space or embark on a DIY landscaping project, building a patio with pavers is an excellent choice. Not only does it add value to your home, but it also provides a functional and inviting space for relaxation, entertainment, and leisure activities. However, if you’re new to the world of patio building, it can be overwhelming to know where to start.
In this comprehensive guide, we will show you how to build a beautiful patio using pavers. We’ll cover everything from the planning stage to adding finishing touches and maintenance tips. By following our step-by-step instructions, you’ll be able to create a stunning patio design that complements your backyard and suits your needs.
Key Takeaways:
- Building a patio with pavers is a fantastic way to enhance your outdoor living space or embark on a DIY landscaping project.
- This comprehensive guide provides step-by-step instructions on how to build a stunning patio design using pavers.
- You’ll learn about planning your patio design, choosing the right pavers, preparing the base, laying the pavers, filling the joints, and adding finishing touches.
- Maintaining your patio is crucial to ensure its longevity and beauty.
- By following our guide, you’ll be able to create a professional-looking patio that reflects your style and enhances your outdoor enjoyment.
Planning Your Patio Design
Before embarking on building your patio, it’s vital to plan out your design. This will ensure that the patio you build suits your needs and complements your outdoor living space. Here are the important aspects to consider when planning your patio:
Size and Shape
The size and shape of your patio will depend on your available space and the intended use. Measure the area where you want to build your patio and determine the ideal shape that fits your design preferences. Consider the available space for seating, dining, and other outdoor activities. Keep in mind that you want your patio to be proportional to your outdoor living space.
Location
Choose the location of your patio carefully, considering both the distance from and the view of your house. Think about which part of your yard gets the most sunlight during the day and which areas are the most shaded. You may also want to consider the surrounding landscape and any structures that may affect your patio’s appearance.
Patio Design
There are endless patio design possibilities, from rustic and simple to modern and elaborate. The design you choose will depend on your personal style and the overall aesthetic of your outdoor living space. Think about incorporating elements such as planters, fire pits, or water features to enhance the ambiance of your patio. You can also choose from a variety of paver patterns, textures, and colors to create a unique look.
Outdoor Living Space
Remember that your patio is an extension of your outdoor living space. The design should reflect your lifestyle and how you prefer to spend your time outdoors. Consider how to incorporate comfortable seating, adequate lighting, and other features that will make the patio a relaxing, enjoyable space to spend time in.

By taking the time to plan your patio design, you’ll ensure that your final result is a stunning addition to your outdoor living space. Next, we’ll move on to choosing the right pavers for your patio design.
Choosing the Right Pavers
When it comes to building a patio with pavers, selecting the right pavers is key to a successful project. Not all pavers are created equal, so it’s important to consider factors such as durability, maintenance, and the overall aesthetic look.
Types of Pavers
There are many types of pavers on the market, each with their own unique features and benefits. Here are some of the most common paver materials:
| Paver Material | Description |
|---|---|
| Concrete | One of the most popular types of pavers due to its affordability and versatility. Concrete pavers come in various colors, shapes, and sizes, making it easy to find a style that fits your patio design. |
| Natural Stone | A high-end option that adds an elegant touch to your patio. Natural stone is durable and requires little maintenance, but it tends to be more expensive than other materials. |
| Brick | A classic option that adds a traditional look to your patio. Brick is durable, slip-resistant, and comes in various colors and patterns. |
Choosing the Right Color and Texture
When selecting pavers for your patio, it’s important to consider both the color and texture. The color should complement your home’s exterior and outdoor living space. For example, if you have a neutral-colored house, you may want to choose a paver with warm tones to create a welcoming atmosphere. The texture should also be considered for practicality. Smooth pavers offer a sleek look but can be slippery when wet, while textured pavers provide a slip-resistant surface.
Durability and Maintenance
Another important factor to consider when choosing pavers for your patio is durability and maintenance. Make sure you select pavers that are strong and can withstand the elements. Additionally, consider the level of maintenance required for your chosen paver material. Some materials may require frequent cleaning or sealing to maintain their appearance and prevent damage.
By taking the time to carefully choose the right pavers for your patio project, you’ll ensure a beautiful and long-lasting outdoor living space.
Preparing the Base
Building a sturdy and long-lasting patio requires proper preparation of the base. Follow these steps to ensure your patio remains stable for years to come:
- Start by excavating the area for your patio. The depth of the excavation will depend on the thickness of the base layers and pavers. In general, you should excavate 6-8 inches deep to create enough room for a 4-inch base layer and 1-2 inches of sand.
- Level the excavated area using a rake and a long piece of wood or a level. This ensures that your patio surface is even and prevents any future issues.
- Next, add a 4-inch layer of crushed stone or gravel to the excavated area. Use a vibrating plate compactor to pack down the base layer, ensuring it is solid and level.
- Add a layer of sand on top of the base layer. The sand should be 1-2 inches deep and, once again, packed down using a vibrating plate compactor. Level the sand to ensure an even surface for your pavers.
By properly preparing the base for your patio, you’ll ensure it remains stable and prevents any shifting or sinking of the pavers over time.
Installing Edge Restraints for Your Patio with Pavers
Edge restraints are a crucial element when building a patio with pavers. They prevent the pavers from shifting or loosening over time and ensure that your patio remains stable and structurally sound. Here’s how you can install edge restraints for your DIY landscaping project:
- Measure and Mark: Start by measuring and marking the perimeter of your patio area. Use stakes and string to create an outline of the patio on the ground.
- Excavate the Area: Dig a trench around the perimeter of the marked area. The trench should be at least 6 inches wide and 6 inches deep.
- Add Base Material: Fill the trench with a base material, such as crushed stone or gravel. Make sure the base material is evenly distributed and levelled.
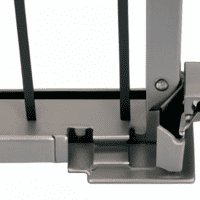
- Install Edge Restraints: Place the edge restraints along the perimeter of the patio area, on top of the base material. Make sure they are level and secured in place using spikes or stakes.
- Backfill and Compact: Fill the area between the edge restraints and the patio with base material. Use a hand tamper or plate compactor to compact the material and ensure it’s levelled.
Once you’ve installed the edge restraints, you can start laying the pavers according to your desired pattern. Keep in mind that the edge restraints should always be flush with the top of the pavers to ensure a seamless finish. By following these steps, you’ll create a stable and long-lasting patio with pavers that you’ll enjoy for years to come.
Laying the Pavers
Now that you have prepared the base and installed the edge restraints, it’s time to lay the pavers. This is the step that will bring your patio design to life.
Here’s a step-by-step guide for laying the pavers:
- Start at one corner of the patio and lay the pavers in your desired pattern. Be sure to leave a small gap between the pavers to allow for the jointing material.
- Continue laying the pavers, making sure they are level and aligned with the edge restraints. Use a rubber mallet to tap the pavers into place.
- If you need to cut any pavers to fit your desired shape, use a masonry saw or chisel. Be sure to wear safety goggles and gloves when cutting the pavers.
- Once you have laid all the full-sized pavers, it’s time to fill in the edges and corners with smaller pieces. You may need to cut these pieces to fit as well.
It’s important to take your time when laying the pavers to ensure a professional-looking result.
Spacing and Patterns
When laying the pavers, it’s important to consider the spacing and patterns. The spacing will determine the amount of jointing material needed and will affect the stability of the patio. The pattern will determine the overall appearance of the patio design.
Here are some spacing and pattern tips:
- Leave a gap of approximately 1/4 to 1/2 inch between the pavers for jointing material.
- Alternate the direction of the pavers to create visual interest.
- Create a border around the patio using a different color or pattern of pavers.
- Experiment with different pattern options such as herringbone, basket weave, or running bond.
Caring for Your Pavers
After laying the pavers, allow the jointing material to settle for a few days before walking on the patio. Once the jointing material has settled, you can fill in any gaps with additional material.
To maintain your patio, it’s important to clean it regularly and address any issues promptly. Use a broom or leaf blower to remove debris and wash the patio with a mild detergent and water as needed. For stubborn stains or moss growth, use a pressure washer or specialized cleaning product.
By following these tips for laying the pavers and maintaining your patio, you’ll have a beautiful outdoor living space to enjoy for years to come.
Filling the Joints
Once the pavers are laid, it’s time to fill in the joints. Filling the joints between the pavers creates a stable and durable surface for your patio. It also enhances the design of the patio by highlighting the pattern of the pavers.
Choosing the Right Jointing Material
There are various materials you can use to fill in the joints between the pavers. Some popular options include:
- Polymeric sand
- Stone dust
- Pea gravel
- Crushed stone
The ideal jointing material will depend on the type of pavers you have used, the location of your patio, and the design of your outdoor living space.
Jointing Techniques
Once you have chosen the jointing material, it’s time to apply it to the patio. There are different techniques you can use to fill the joints, including:
- Sweeping in the material and compacting it into the joints
- Using a rubber mallet to tap the material into the joints
- Watering the material into the joints
It’s important to follow the manufacturer’s instructions when applying the jointing material. In most cases, the material needs to be dry and the excess must be swept away after application.
Paver Patterns
The jointing material can also be used to highlight different paver patterns. For example, contrasting colors can be used to emphasize the herringbone pattern of the pavers. Alternatively, a single color can be used to create a seamless and uniform look.
Pro Tip: Consider using a sealant on the jointing material to prevent weed growth and erosion.
By filling in the joints with the right material and using the appropriate technique, you can create a patio that is both visually appealing and structurally sound. Don’t underestimate the importance of this step in creating a long-lasting patio that you’ll enjoy for years to come.
Sealing the Pavers
While it’s an optional step in the process, sealing your patio pavers is an effective way to protect them from natural elements, UV rays, and stains, especially if you plan on hosting outdoor gatherings frequently. Here’s how to seal your patio:
- Clean the pavers thoroughly by using a pressure washer or a stiff-bristled brush and mild detergent.
- Resand the joints with polymeric sand and sweep off any excess sand on the surface of the pavers.
- Choose a high-quality sealer that is compatible with your pavers and the jointing material.
- Apply the sealer on a dry and cool day, using a sprayer or a roller, following the manufacturer’s instructions for coverage and drying time.
- Let the sealer dry completely before walking or placing any furniture or plants on the patio.
By sealing your pavers, you’ll not only give them a glossy finish, but also prevent any future damage from moisture, freeze-thaw cycles, or oil spills. It’s recommended to reseal your patio every 3-5 years, depending on the weather conditions in your area, to maintain its appearance and durability.
Tip: Sealing can alter the color of some paver types and finishes. Do a small test area first to ensure you’re happy with the result before applying the sealer to the entire patio.
Adding Finishing Touches to Your Paver Patio
Now that you have completed the installation of your new paver patio, it’s time to add some finishing touches to create an inviting outdoor living space. Here are some ideas:
Border Options
Adding a border to your patio can add visual interest and help define the space. Consider using contrasting pavers or even natural stone to create a unique border design. You can also edge your patio with plants or arrange decorative rocks to add texture and depth.
Lighting
Outdoor lighting can make your patio more enjoyable in the evenings and add a touch of ambiance. Consider adding string lights or placing lanterns around the perimeter of your patio. You can also install low-voltage landscape lighting to highlight specific features or create a pathway to your patio.
Landscaping
Planting flowers, shrubs, or trees around your patio can create a peaceful and serene outdoor environment. Consider selecting plants that complement your home’s architecture and color scheme. You can also add raised flower beds or incorporate a water feature for a more tranquil setting.
Seating and Dining
Your patio is the perfect place to relax and dine with family and friends. Consider adding outdoor furniture such as a table and chairs, comfortable seating, or even a hammock. Make sure to select weather-resistant materials that can withstand the elements.
Outdoor Kitchen
If you love to cook and entertain outdoors, consider adding an outdoor kitchen to your patio. You can install a grill, countertop, sink and even a refrigerator to create a complete outdoor cooking and dining experience.
With these finishing touches, your new paver patio will become a beautiful and functional addition to your outdoor living space.
Maintaining Your Patio
After completing your beautiful patio with pavers, it’s important to know how to maintain it properly. Regular maintenance will keep your patio looking great for years to come. Here are some essential tips for keeping your patio in excellent condition:
- Clean your patio regularly: Keep your patio clean by regularly sweeping away debris and washing it with a mild soap solution. This will help prevent stains and buildup of grime.
- Control weed growth: Check for weeds regularly and pull them out by the roots as soon as you notice them. Use a weed killer spray for persistent weed growth.
- Fix any issues quickly: If you notice any pavers beginning to sink or become unstable, address the issue immediately to prevent larger problems from arising.
- Re-sand the joints: Over time, sand between the pavers can wash away or erode. Re-sand the joints once a year to maintain stability and prevent weed growth.
By following these maintenance tips, you can keep your patio in great condition and extend its lifespan. A well-maintained patio with pavers will continue to impress your family and friends, providing a beautiful space for outdoor activities and relaxation. Happy DIY landscaping!
Expanding Your Outdoor Living Space
Now that you’ve successfully built a stunning patio with pavers, it’s time to think of other ways to expand your outdoor living space. Whether you want to create a cozy seating area or a full-blown outdoor kitchen, there are plenty of DIY landscaping projects you can tackle to enhance your backyard. Here are a few ideas to get you started:
Create a Cozy Seating Area
Transform a corner of your backyard into a relaxing seating area by adding comfortable chairs, a table, and some decorative elements. Consider using a pergola or a shade sail to provide shade and privacy, or add strings of lights for a cozy evening atmosphere.
Install a Fire Pit
A fire pit is a great addition to any backyard and can be used for warmth, cooking, or simply enjoying the ambiance. You can choose from a wide variety of styles and materials, or even build your own using pavers or bricks.
Build an Outdoor Kitchen
If you love to cook and entertain, an outdoor kitchen can take your backyard to the next level. A simple setup can include a grill, a countertop, and some storage space, while a more elaborate design can feature a sink, a refrigerator, and a pizza oven.
Create a Garden Oasis
Take advantage of your outdoor space by creating a lush garden oasis. You can plant flowers, shrubs, and trees to add color and texture, or create a vegetable garden for fresh produce. Incorporate pathways and seating areas to encourage exploration and relaxation.
Whatever project you decide to undertake, make sure to plan it thoroughly and choose materials that complement your patio design. With some creativity and elbow grease, you can transform your backyard into an inviting outdoor living space that you’ll enjoy for years to come.
Conclusion
In conclusion, creating a stunning patio with pavers is a fun and rewarding project that can transform your outdoor living space into a beautiful retreat. By carefully planning your patio design, selecting the right pavers, preparing the base, and following the installation steps, you can achieve a professional-looking patio that complements your backyard.
Don’t forget to add finishing touches such as lighting, landscaping, and borders to enhance the beauty and functionality of your patio. And once your patio is complete, our maintenance guide will help you keep it looking its best for years to come.
Expand Your Outdoor Living Space
To take your outdoor living space to the next level, consider incorporating additional features such as seating areas, dining spaces, fire pits, and water features. With some creativity and DIY landscaping skills, you can create a cohesive backyard design that maximizes your enjoyment of the outdoors.
Thank you for choosing our comprehensive guide to building a patio with pavers. We hope you found it helpful and informative. Get started on your patio project today and begin enjoying your new outdoor living space!
FAQ
How do I start building a patio with pavers?
To start building a patio with pavers, you’ll first need to plan your design, choose the right pavers, and prepare the base. Our comprehensive guide provides step-by-step instructions to help you get started.
What factors should I consider when choosing pavers for my patio?
When choosing pavers for your patio, you should consider factors such as the type of pavers, colors, textures, durability, and maintenance requirements. Our guide on choosing the right pavers will provide you with all the information you need to make an informed decision.
How do I prepare the base for my patio?
Preparing the base for your patio involves excavation, leveling, and compacting. These steps are crucial for ensuring a stable and long-lasting patio. Our guide on preparing the base will walk you through the process in detail.
Why are edge restraints important for my patio?
Edge restraints are essential for keeping your patio pavers in place and preventing shifting or spreading. Our guide on installing edge restraints will provide you with instructions on how to properly install them for a structurally sound patio.
How do I lay the pavers for my patio?
Laying the pavers for your patio involves spacing, patterns, and cutting pavers to fit your desired shape. Our step-by-step guide on laying the pavers will ensure that you achieve a professional-looking result.
What materials and techniques can I use to fill the joints between the pavers?
There are various jointing materials and techniques you can use to fill the joints between the pavers. Our guide on filling the joints will explain different options and provide recommendations based on your patio design and preferences.
Should I seal the pavers on my patio?
Sealing the pavers on your patio is an optional step that can provide additional protection and prolong their lifespan. Our guide on sealing the pavers will walk you through the benefits, application methods, and maintenance tips.
What finishing touches can I add to my patio design?
There are various finishing touches you can add to your patio design, such as borders, lighting, and landscaping ideas. Our guide on adding finishing touches will inspire you with ideas to enhance the overall aesthetic of your outdoor living space.
How do I maintain my patio once it’s complete?
Maintaining your patio involves regular cleaning, weed control, and addressing any potential issues. Our guide on maintaining your patio will provide you with valuable tips to ensure its longevity and beauty.
How can I expand my outdoor living space beyond just a patio?
Once you’ve built a patio with pavers, you can explore additional ways to expand your outdoor living space, such as incorporating seating, dining, and other features. Our guide on expanding your outdoor living space will provide you with inspiration for a cohesive backyard design.
- Crafting a Dream Patio with Pavers - November 26, 2023
- DIY Patio Paver Construction - November 24, 2023
- Creating Stunning Patios with Pavers - November 21, 2023