Mastering Patio Paver Installation
Transform your backyard into an inviting outdoor oasis with beautiful patio pavers. Installing patio pavers is an excellent way to create an aesthetically pleasing and functional outdoor flooring option that can withstand the elements. Whether you’re looking to spruce up your backyard or create a new outdoor living space, patio pavers make for an ideal choice. In this comprehensive guide, you’ll learn everything there is to know about laying patio pavers, from planning and design to execution and maintenance.
Key Takeaways
- Patio pavers are a durable, functional, and visually appealing outdoor flooring option for your backyard.
- Proper planning, design, and execution are essential for a successful patio paver installation.
- Materials and tools required for patio paver installation include concrete, stone, brick, shovel, tape measure, level, and rubber mallet, among others.
- The process of laying patio pavers includes planning and designing the layout, preparing the ground, installing the base material, placing and leveling the pavers, cutting and fitting pavers, adding edging and joint sand, and finishing touches and maintenance.
- Regular maintenance, such as sweeping and occasional pressure washing, will keep your patio looking its best for years to come.
Understanding Patio Paver Materials and Tools
Before you start laying patio pavers, it’s important to gather all the necessary materials and tools. Choosing the right materials can make a big difference in the look and longevity of your patio paver design. Concrete, stone, and brick are popular options. Consider factors like color, texture, and durability when making your selection.
Tools are equally important. Without the right ones, your project may be more challenging than necessary. Gather a shovel, tape measure, level, rubber mallet, and safety gear, including gloves and eye protection. A plate compactor is also essential for ensuring the stability of the base material.
Table: Comparing Patio Paver Materials
| Material | Pros | Cons |
|---|---|---|
| Concrete | Durable, varied color options, affordable | May crack over time, less natural appearance |
| Stone | Natural appearance, varied texture options | More expensive, may absorb stains and require sealing |
| Brick | Uniform shape and size, affordable, classic look | May fade over time, may shift and require re-leveling |
Once you have all the materials and tools you need, it’s time to move on to planning and designing your patio layout.
Planning and Designing Your Patio Layout
Creating a well-designed patio requires careful planning and attention to detail. By considering factors like the available space, existing landscaping elements, and your personal style preferences, you can create a beautiful and functional outdoor living area. When planning your patio layout, keep in mind the following tips:
Determine the Size and Shape of Your Patio
The first step in planning your patio is deciding on the size and shape. Consider how you will use the space and how many people you want to accommodate. You’ll want to make sure there’s enough room for furniture and traffic flow. You may also want to think about incorporating features like a fire pit or outdoor kitchen.
Experiment with Different Paver Layout Patterns
One of the benefits of using patio pavers is the wide variety of layout patterns available. Popular options include herringbone, basket weave, and running bond. Experiment with different patterns to find one that complements your home’s architecture and showcases your personal style.
| Layout Pattern | Description | Image |
|---|---|---|
| Herringbone | Alternating pairs of rectangular pavers create a zigzag pattern. |  |
| Basket Weave | Two rectangular pavers are placed horizontally, followed by two pavers placed vertically. | |
| Running Bond | Rectangular pavers are staggered in a brick-like pattern. | |
Consider Using Different Paver Sizes

Another way to add visual interest to your patio is by incorporating pavers of different sizes. Mixing rectangular and square pavers can create a unique and eye-catching look.
By taking the time to plan your patio layout and experimenting with different design elements, you can create a stunning outdoor space that you’ll enjoy for years to come.
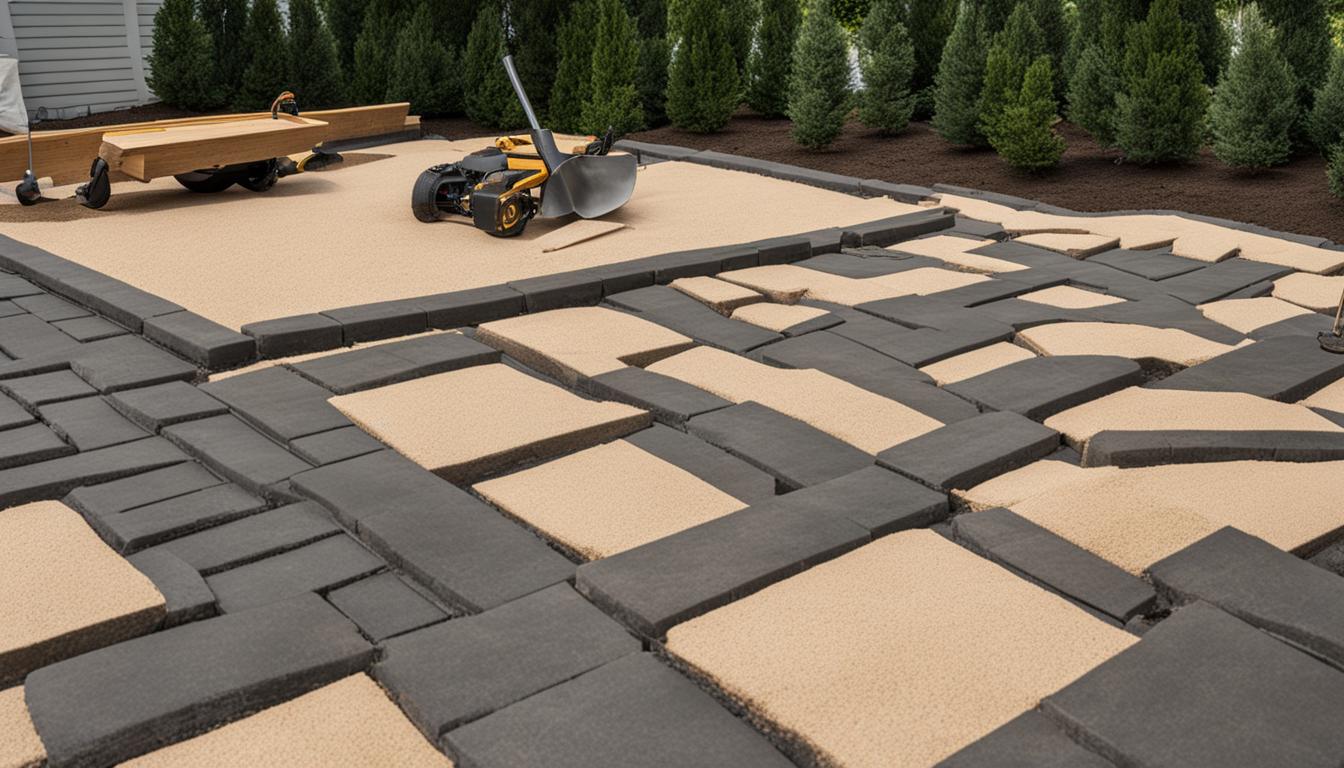
Preparing the Ground for Your Patio Paver Installation
Before starting your patio paver project, you need to prepare the ground. Proper ground preparation ensures that your pavers are level, stable, and durable for years to come. Follow these steps to properly prepare the ground:
- Clear the area of any debris or vegetation, including grass, rocks, and roots. Use a shovel or a sod cutter to remove any grass or other vegetation in the area.
- Ensure that the ground is level. Use a long, straight board or a level to check and make sure that the ground is flat. If there are any low spots, fill them with soil and compact it down with a tamper or plate compactor.
- Dig down to a depth of at least 6 inches to make room for the base material and pavers. Use a shovel, a hoe, or a rented excavation machine to dig down to the desired depth. If you’re installing your patio against the house, make sure the finished surface is at least 1 inch below the siding or weep screed to prevent water damage.
After you’ve prepared the ground, it’s time to install the base material. Check out the next section for more details on how to lay patio pavers.
Installing the Base Material
Before laying your patio pavers, you’ll need to create a stable base to ensure their longevity. Here are the steps:
- Clear the area: Start by removing any debris or vegetation from the ground to create an even surface for your base material.
- Excavate the soil: Use a shovel to dig down to the appropriate depth, considering the thickness of your pavers and base material. A depth of roughly 6 inches should suffice for most patios.
- Add gravel or crushed stone: Pour a layer of gravel or crushed stone into the excavated area, filling it to about 2-3 inches deep, depending on the depth of your excavation.
- Compact the base layer: Use a plate compactor to compact the gravel or crushed stone layer. This will help to create a stable base for your pavers and ensure proper drainage.
- Add a layer of sand: Spread a layer of sand that is about 1 inch deep over the compacted base material. Use a rake to level the sand layer.
- Compact the sand: Use the plate compactor to compact the sand layer. This will create a level surface for your pavers and prevent them from settling over time.
Once you have completed these steps, you’re ready to start laying your patio pavers. Moving forward with the best installation techniques will result in a beautiful and long-lasting outdoor space.
Placing and Leveling the Pavers
With your base material in place, it’s time to start laying the pavers. Begin at one corner and work your way across, using your chosen pattern as a guide. Be sure to leave a small gap between each paver to allow for sand infill.
As you lay each paver, tap it gently with a rubber mallet to ensure it’s firmly in place. Check for levelness frequently, using a level to make adjustments as needed. This is especially important for areas where the pavers butt up against each other, as any misalignment can cause problems later on.
Checking for Proper Slope
As you lay the pavers, be sure to maintain a slight slope away from your home or other structures to prevent water damage. A slope of 1/8 inch per foot is recommended, meaning that for every foot of distance away from your home, the patio should drop 1/8 inch.
To check for proper slope, place a level on the surface of the pavers. If you notice any low spots, remove the pavers and add more sand or gravel as needed to create a smooth and even surface.
Dealing with Obstacles
As you work your way across the patio, you may encounter obstacles such as trees, posts, or outdoor fixtures. To fit the pavers around these obstacles, you’ll need to make some cuts.
Use a chisel and hammer or a specialized paver saw to cut the pavers to the desired size and shape. Take your time to achieve precise cuts, as this will help create a seamless and professional-looking patio.
Once you’ve finished placing all of the pavers, fill the joints with fine sand, brushing it into the gaps and compacting it with a broom. This sand infill will help lock the pavers in place and prevent shifting over time, ensuring a sturdy and long-lasting patio.
Cutting and Fitting Pavers
As you approach edges, obstacles, or other irregularities, you’ll need to cut and shape pavers to fit neatly within the design. Follow these instructions to get precise cuts that will create a professional-looking patio.
Cutting Tools
There are several tools that you can use to cut pavers, including a chisel, hammer, or specialized paver saw.
| Tool | Advantages | Disadvantages |
|---|---|---|
| Chisel and Hammer | Inexpensive; easy to use for simple cuts | Difficult to make precise cuts; can cause pavers to break |
| Paver Saw | Precise cuts; can handle complex shapes | Expensive; loud and messy |
Whichever tool you choose, make sure to wear safety goggles and gloves to protect yourself from flying debris.
Cutting Techniques
Follow these basic steps for cutting pavers:
- Mark the paver with a pencil or chalk where you need to cut.
- Place the paver on a flat surface with the marked line facing up.
- Use a chisel to score the paver along the marked line.
- Use the hammer to tap along the scored line until the paver breaks cleanly.
For more complex cuts, use a specialized paver saw. Follow the manufacturer’s instructions carefully and take your time to achieve a precise cut.
Fitting Techniques
When fitting pavers around irregular shapes or obstacles, it’s important to ensure a tight fit. Use a chisel to shape the edges of the paver as needed, taking care not to remove too much material.
Pro Tip: Cut your pavers slightly larger than the space requires to leave room for adjustment. You can always remove more material if necessary.
With patience and practice, you’ll soon become an expert at cutting and fitting pavers for a beautiful and functional patio.
Adding Edging and Joint Sand
Once your patio pavers are in place, adding edging materials will create a clean and defined border, while also helping to keep the pavers in place and prevent shifting over time. The type of edging you choose will depend on your desired aesthetic and the materials you have used for your patio.
For a classic look, consider using brick or concrete pavers as edging. These materials will complement your patio and provide a seamless transition between the pavers and the surrounding landscape. Alternatively, you could opt for natural stone or landscaping timbers for a more rustic or natural appeal.
Before installing the edging, make sure the area around the patio is level and free of debris. Use a rubber mallet to secure the edging materials in place and ensure a snug fit. If needed, use stakes or spikes to hold the edging firmly in place.
Once the edging is installed, it’s time to fill the joints between the pavers with fine sand. This step will help to lock the pavers in place and prevent weeds from growing between the cracks. Start by pouring sand onto the surface of the patio and sweeping it into the joints with a broom. Be sure to fill each joint completely to the top.
Once the sand is in place, use a plate compactor to vibrate the joints and remove any air pockets. This will help to create a solid and stable surface. Sweep away any excess sand and spray the surface of the patio with water to settle the sand into place.
Finishing Touches and Maintenance
Now that your beautiful new patio is complete, it’s time to add those final touches and make sure you keep it looking its best over time. Here are some tips and tricks for finishing your project and maintaining your patio:
Give it a Good Clean
Before enjoying your new outdoor space, be sure to give it a thorough cleaning. Sweep away any excess sand and dirt from the surface of the pavers, and use a hose or pressure washer to remove any stubborn stains. This will help to keep your patio looking its best and prevent any buildup of dirt or grime.
Consider a Sealant
To protect your patio from the elements and preserve its color and texture, consider applying a sealant to the surface of the pavers. This is especially important if your patio is made of porous materials like natural stone, which can be susceptible to staining and damage from moisture. A sealant will help to repel water and prevent fading, keeping your patio looking great for years to come.
Maintain Regularly
Regular maintenance is key to preserving the quality and appearance of your patio. Sweeping away debris, removing any weeds or plants that may grow between the pavers, and occasionally pressure washing the surface will all help to keep your patio in tip-top shape. Additionally, be sure to inspect the area for any cracks or damage that may need repairs or touch-ups.
Try Out Some Outdoor Flooring
If you’re looking to add a bit of variety to your patio, consider incorporating different types of outdoor flooring. From outdoor rugs to tiles or custom designs, there are a variety of options to explore that can add visual interest and personality to your outdoor space.
Don’t Forget the Patio Furniture
No patio is complete without the right furniture to enjoy it with. Whether it’s a simple bistro set for two or a large outdoor sectional for entertaining, be sure to select furniture that complements the design of your patio and suits your needs and personal style.
Conclusion
Congratulations, you’ve now mastered the art of laying patio pavers! By following the step-by-step process outlined in this guide, you can create a durable and visually stunning outdoor space that will enhance the value and functionality of your home.
Remember to carefully plan and design your patio layout, select the right materials and tools, and prepare the ground properly before beginning the installation process. Take your time during the installation, ensuring the pavers are level and neatly fitted, and add the final touches of edging and joint sand.
Don’t forget to maintain your patio regularly, sweeping away debris and occasionally pressure washing the surface. Applying a sealant to porous materials like natural stone can help enhance the color and durability of your patio pavers.
Enjoy Your New Patio!
With these simple tips and techniques, you can transform your outdoor space and create a beautiful and functional area for relaxation and entertainment. So grab a book, a drink, and a few friends, and enjoy your new patio!
FAQ
How do I choose the right patio paver material?
When selecting a patio paver material, consider factors such as durability, aesthetic appeal, and maintenance requirements. Concrete, stone, and brick are popular options that offer various design possibilities.
What tools do I need for patio paver installation?
Essential tools for laying patio pavers include a shovel, tape measure, level, rubber mallet, and a plate compactor. These tools will help you excavate the ground, level the base material, and ensure the proper placement and alignment of the pavers.
How should I plan the layout of my patio?
Before starting your patio paver installation, carefully plan the size and shape of your patio. Consider the available space, existing landscaping features, and desired design. Experiment with different layout patterns, such as herringbone or basket weave, to enhance the visual appeal of your patio.
What is the importance of preparing the ground for patio paver installation?
Proper ground preparation is crucial for the longevity of your patio pavers. Clear the area of debris and vegetation, ensuring the ground is level. Excavate the soil to the appropriate depth, considering the thickness of the pavers and the required base material.
What is the purpose of the base material in patio paver installation?
The base material provides stability and proper drainage for your patio. Start by adding a layer of gravel or crushed stone to the excavated area, which should then be compacted using a plate compactor. Follow this with a layer of sand, leveling and compacting it as well.
How do I place and level the patio pavers?
Start laying the pavers according to your chosen design and pattern. Use a string or straight edge to ensure proper alignment of the rows. Tap each paver gently with a rubber mallet to ensure a secure fit, checking for levelness periodically and making adjustments as needed.
How do I cut and fit pavers?
Cutting and fitting pavers is necessary to accommodate obstacles or edges. Use a chisel, hammer, or a specialized paver saw to achieve precise cuts. Take your time to ensure professional and seamless results.
Why is edging important in patio paver installation?
Edging materials help create a clean and defined border for your patio, preventing shifting and keeping the pavers in place. Install edging along the perimeter of the patio for a polished finish.
What is the purpose of joint sand?
Joint sand is used to fill the gaps between the patio pavers. Brush the sand into the joints and compact it with a broom. This helps stabilize the pavers and prevents weed growth.
How do I maintain my patio paver installation?
Regular maintenance is important to keep your patio looking its best. Sweep away any excess sand and clean the surface periodically. Consider applying a sealant to enhance durability and color, especially for pavers made of porous materials like natural stone.
- Crafting a Dream Patio with Pavers - November 26, 2023
- DIY Patio Paver Construction - November 24, 2023
- Creating Stunning Patios with Pavers - November 21, 2023